실행 환경
python 3.7.5
tensorflow & tensorflow-gpu 1.14.0
opencv-python 4.5.1.48
CUDA 10.0 버전 사용
1. 필요 모듈 설치
pip install opencv-python==4.5.1.48
pip install cython
pip install tensorflow==1.14.0
pip install tensorflow-gpu==1.14.0
#tensorflow 버전에 맞는 CUDA와 CUDNN을 설치해주어야 한다.
그리고 나는 youtube동영상 링크를 가져와 해당 영상에서 객체탐지를 실행하고, 저장하는 방식을 사용하려고 한다
따라서, youtube동영상을 가져올 수 있도록 하는 해당 모듈도 설치
pip install youtube-dl
pip install pafy
2. darkflow 설치
Anaconda prompt상에서 git clone을 통해 가져올 것이다.
Anaconda prompt상의 기본 경로는 C:\Users\user이므로 darkflow설치 경로를 바꾸고싶다면 cd명령어를 통해 이동하도록 하자. 나는 기본 경로에 설치하였다.
git clone https://github.com/thtrieu/darkflow.git #darkflow 설치
git clone https://github.com/thtrieu/darkflow.gitthtrieu/darkflow
Translate darknet to tensorflow. Load trained weights, retrain/fine-tune using tensorflow, export constant graph def to mobile devices - thtrieu/darkflow
github.com
cd darkflow
python setup.py build_ext --inplace
pip install .
해당 명령어 까지 실행 되면 darkflow설치가 완료된 것이다. (만약 install 되지 않는다면 visual studio c++ 개발환경을 설치해주어야 한다.)
-- weights 파일 다운로드
https://pjreddie.com/darknet/yolo/
YOLO: Real-Time Object Detection
YOLO: Real-Time Object Detection You only look once (YOLO) is a state-of-the-art, real-time object detection system. On a Pascal Titan X it processes images at 30 FPS and has a mAP of 57.9% on COCO test-dev. Comparison to Other Detectors YOLOv3 is extremel
pjreddie.com
위 사이트에서 이미 학습되어 있는 가중치 파일인 YOLOv2 608x608 weights를 다운받아 darkflow폴더 내에 bin폴더를 만든 후 그 안에 넣어주었다.
3. darkflow 실행 시켜 보기
Anaconda 상에서 실행시키는 방법도 있지만, 박스 컬러나, 두께, 혹은 기타 세부사항들을 커스터마이징 해보기 위해서Spyder상에서 실행해 보았다.
필요한 모듈을 import 해준다.
from darkflow.net.build import TFNet
import cv2
import numpy as np
import pafy
사용할 동영상은 yotube의 주택 내부 탐방영상을 사용하여 객체 탐지를 해볼것이다.
www.youtube.com/watch?v=o3M1S8Ze6J0
위 영상의 링크를 url에 넣어주고 1440p의 동영상을 가져오기 위해 링크 뒤에 "&vq=hd1440"을 추가하였다.
url = "https://www.youtube.com/watch?v=o3M1S8Ze6J0&vq=hd1440"
video = pafy.new(url)
best = video.getbest(preftype="mp4")
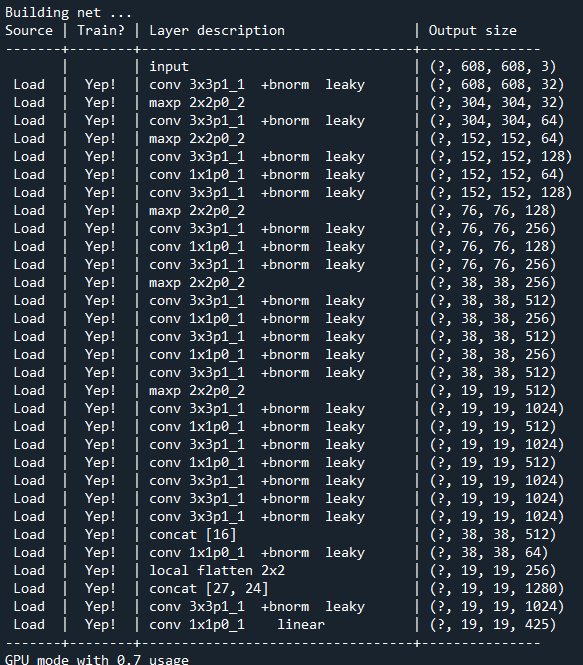
cap = cv2.VideoCapture(best.url)cfg파일, weights파일, names파일의 경로를 입력해주고 TFNet에 각 옵션을 먹여준다.
나는 신뢰도는 0.3, GPU사용량은 0.7로 설정하였다(gpu사용량이 너무 높으면 실행 되다가 마는 경우가 발생한다.)
model_path = "./cfg/yolo.cfg"
weights_path = "./bin/yolov2.weights"
name_path="./cfg/coco.names"

options = {"model": model_path, "load": weights_path, "threshold": 0.3, "gpu": 0.7}
tfnet = TFNet(options)
youtube영상의 한 프레임의 넓이, 높이 즉 해상도 정보를 가져오고, 영상 길이 즉 프레임 개수를 가져와 width, height, length에 저장하였다.
width = cap.get(cv2.CAP_PROP_FRAME_WIDTH)
height = cap.get(cv2.CAP_PROP_FRAME_HEIGHT)
length = int(cap.get(cv2.CAP_PROP_FRAME_COUNT))
names파일로부터 각 객체들의 label들을 불러와 LABELS에 저장하고, COLORS에는 각 라벨에 랜덤 컬러를 하나씩 지정해주어 객체 탐지화면에서 각 객체들이 잘 구별될 수 있도록 고유의 box color를 갖게 해주었다
또한 결과인 output은 30프레임의 원본 동영상과 같은 해상도, 형식은 avi로 저장되게 하였다.
LABELS = open(name_path).read().strip().split("\n")
np.random.seed(3)
COLORS = np.random.randint(0, 255, size=(len(LABELS), 3),dtype="uint8")
color={name:value for name, value in zip(LABELS,COLORS)}

fourcc = cv2.VideoWriter_fourcc(*'DIVX')
out = cv2.VideoWriter('../output/output.avi',fourcc, 30, (int(width), int(height)))
다음은 각 프레임을 연속적으로 불러오면서 장면, 장면마다의 객체를 탐지하고, 동영상으로 저장하는 부분이다.
cnt=0
while True:
cnt+=1
ret, frame = cap.read()
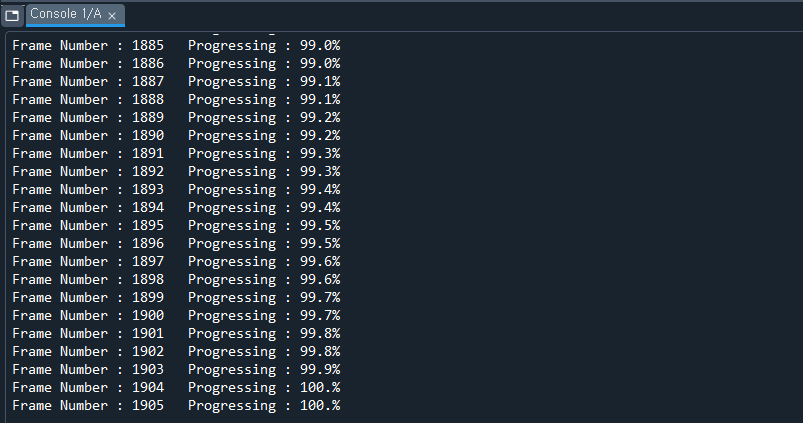
print('Frame Number : '+str(cnt)+' Progressing : ' +str(cnt/length*100)[:4] +'%')
if ret == True:
frame = np.asarray(frame)
results = tfnet.return_predict(frame)
for result in results:
top_x = result['topleft']['x']
top_y = result['topleft']['y']
btm_x = result['bottomright']['x']
btm_y = result['bottomright']['y']
confidence = result['confidence']
label = result['label'] + " " + str(round(confidence, 3))
if confidence > options['threshold']:
c=color[result['label']]
frame = cv2.rectangle(frame, (top_x, top_y), (btm_x, btm_y), (int(c[0]),int(c[1]),
int(c[2])), 3)
frame = cv2.rectangle(frame, (top_x - 1, top_y), (top_x + len(label) * 11+15 ,
top_y - 20), (0, 0, 0), -1)
frame = cv2.putText(frame, label, (top_x, top_y-5), cv2.FONT_HERSHEY_COMPLEX_SMALL ,
0.9, (250, 250, 250), 1, cv2.LINE_AA)
out.write(frame)
cv2.imshow('frame',frame)
if cv2.waitKey(1) & 0xFF == ord('q'):
break
else:
break
cap.release()
out.release()
cv2.destroyAllWindows()cnt는 다음과 같이 콘솔창에 진행 상황과, 프레임 수를 표기하기위해 넣어주었다.

4. 결과
현재 내 컴퓨터의 GPU는 gtx1660super로 학습되어 있는 가중치 파일을 이용한 객체탐지는 충분히 여유있게 돌아가는 모습이였다. (gtx960의 경우 초당 5프레임 정도로 매우 느려서 답답했었다)
기본적인 것만 학습되어 있다보니 신뢰도는 그렇게 좋지 않은 모습을 보였다. 이후 내가 찾거나 구분하고자 하는 객체들을 학습시킨다면 더 확실한 객체의 구분과 탐지가 가능할 것으로 보인다
#full code
from darkflow.net.build import TFNet
import cv2
import numpy as np
import pafy

url = "https://www.youtube.com/watch?v=o3M1S8Ze6J0&vq=hd1440"
video = pafy.new(url)
best = video.getbest(preftype="mp4")
cap = cv2.VideoCapture(best.url)

model_path = "./cfg/yolo.cfg"
weights_path = "./bin/yolov2.weights"
name_path="./cfg/coco.names"

options = {"model": model_path, "load": weights_path, "threshold": 0.3, "gpu": 0.7}
tfnet = TFNet(options)

width = cap.get(cv2.CAP_PROP_FRAME_WIDTH)
height = cap.get(cv2.CAP_PROP_FRAME_HEIGHT)
length = int(cap.get(cv2.CAP_PROP_FRAME_COUNT))

LABELS = open(name_path).read().strip().split("\n")
np.random.seed(3)
COLORS = np.random.randint(0, 255, size=(len(LABELS), 3),dtype="uint8")
color={name:value for name, value in zip(LABELS,COLORS)}

fourcc = cv2.VideoWriter_fourcc(*'DIVX')
out = cv2.VideoWriter('./output/output.avi',fourcc, 30, (int(width), int(height)))

cnt=0
while True:
    cnt+=1
    ret, frame = cap.read()
    print('Frame Number : '+str(cnt)+'   Progressing : ' +str(cnt/length*100)[:4] +'%')

    if ret == True:
        frame = np.asarray(frame)
        results = tfnet.return_predict(frame)

        for result in results:
            top_x = result['topleft']['x']
            top_y = result['topleft']['y']

            btm_x = result['bottomright']['x']
            btm_y = result['bottomright']['y']

            confidence = result['confidence']
            label = result['label'] + " " + str(round(confidence, 3))

            if confidence > options['threshold']:
                c=color[result['label']]
                frame = cv2.rectangle(frame, (top_x, top_y), (btm_x, btm_y), (int(c[0]),int(c[1]),
                                                                              int(c[2])), 3)

                frame = cv2.rectangle(frame, (top_x - 1, top_y), (top_x + len(label) * 11+15 ,
                                                                  top_y - 20), (0, 0, 0), -1)

                frame = cv2.putText(frame, label, (top_x, top_y-5), cv2.FONT_HERSHEY_COMPLEX_SMALL ,
                                    0.9, (250, 250, 250), 1, cv2.LINE_AA)

        out.write(frame)
        cv2.imshow('frame',frame)
        if cv2.waitKey(1) & 0xFF == ord('q'):
            break
    else:
        break

cap.release()
out.release()
cv2.destroyAllWindows()
'Python > Object Detecting' 카테고리의 다른 글
| [python] YOLOv5 이용 객체탐지 및 실시간 Object size 측정하기 (20) | 2021.08.01 |
|---|---|
| [python] yolov5이용, 간단한 객체 학습 후 탐지 (16) | 2021.06.13 |


댓글